Incline Push Ups – How To Do, Benefits, And Variations
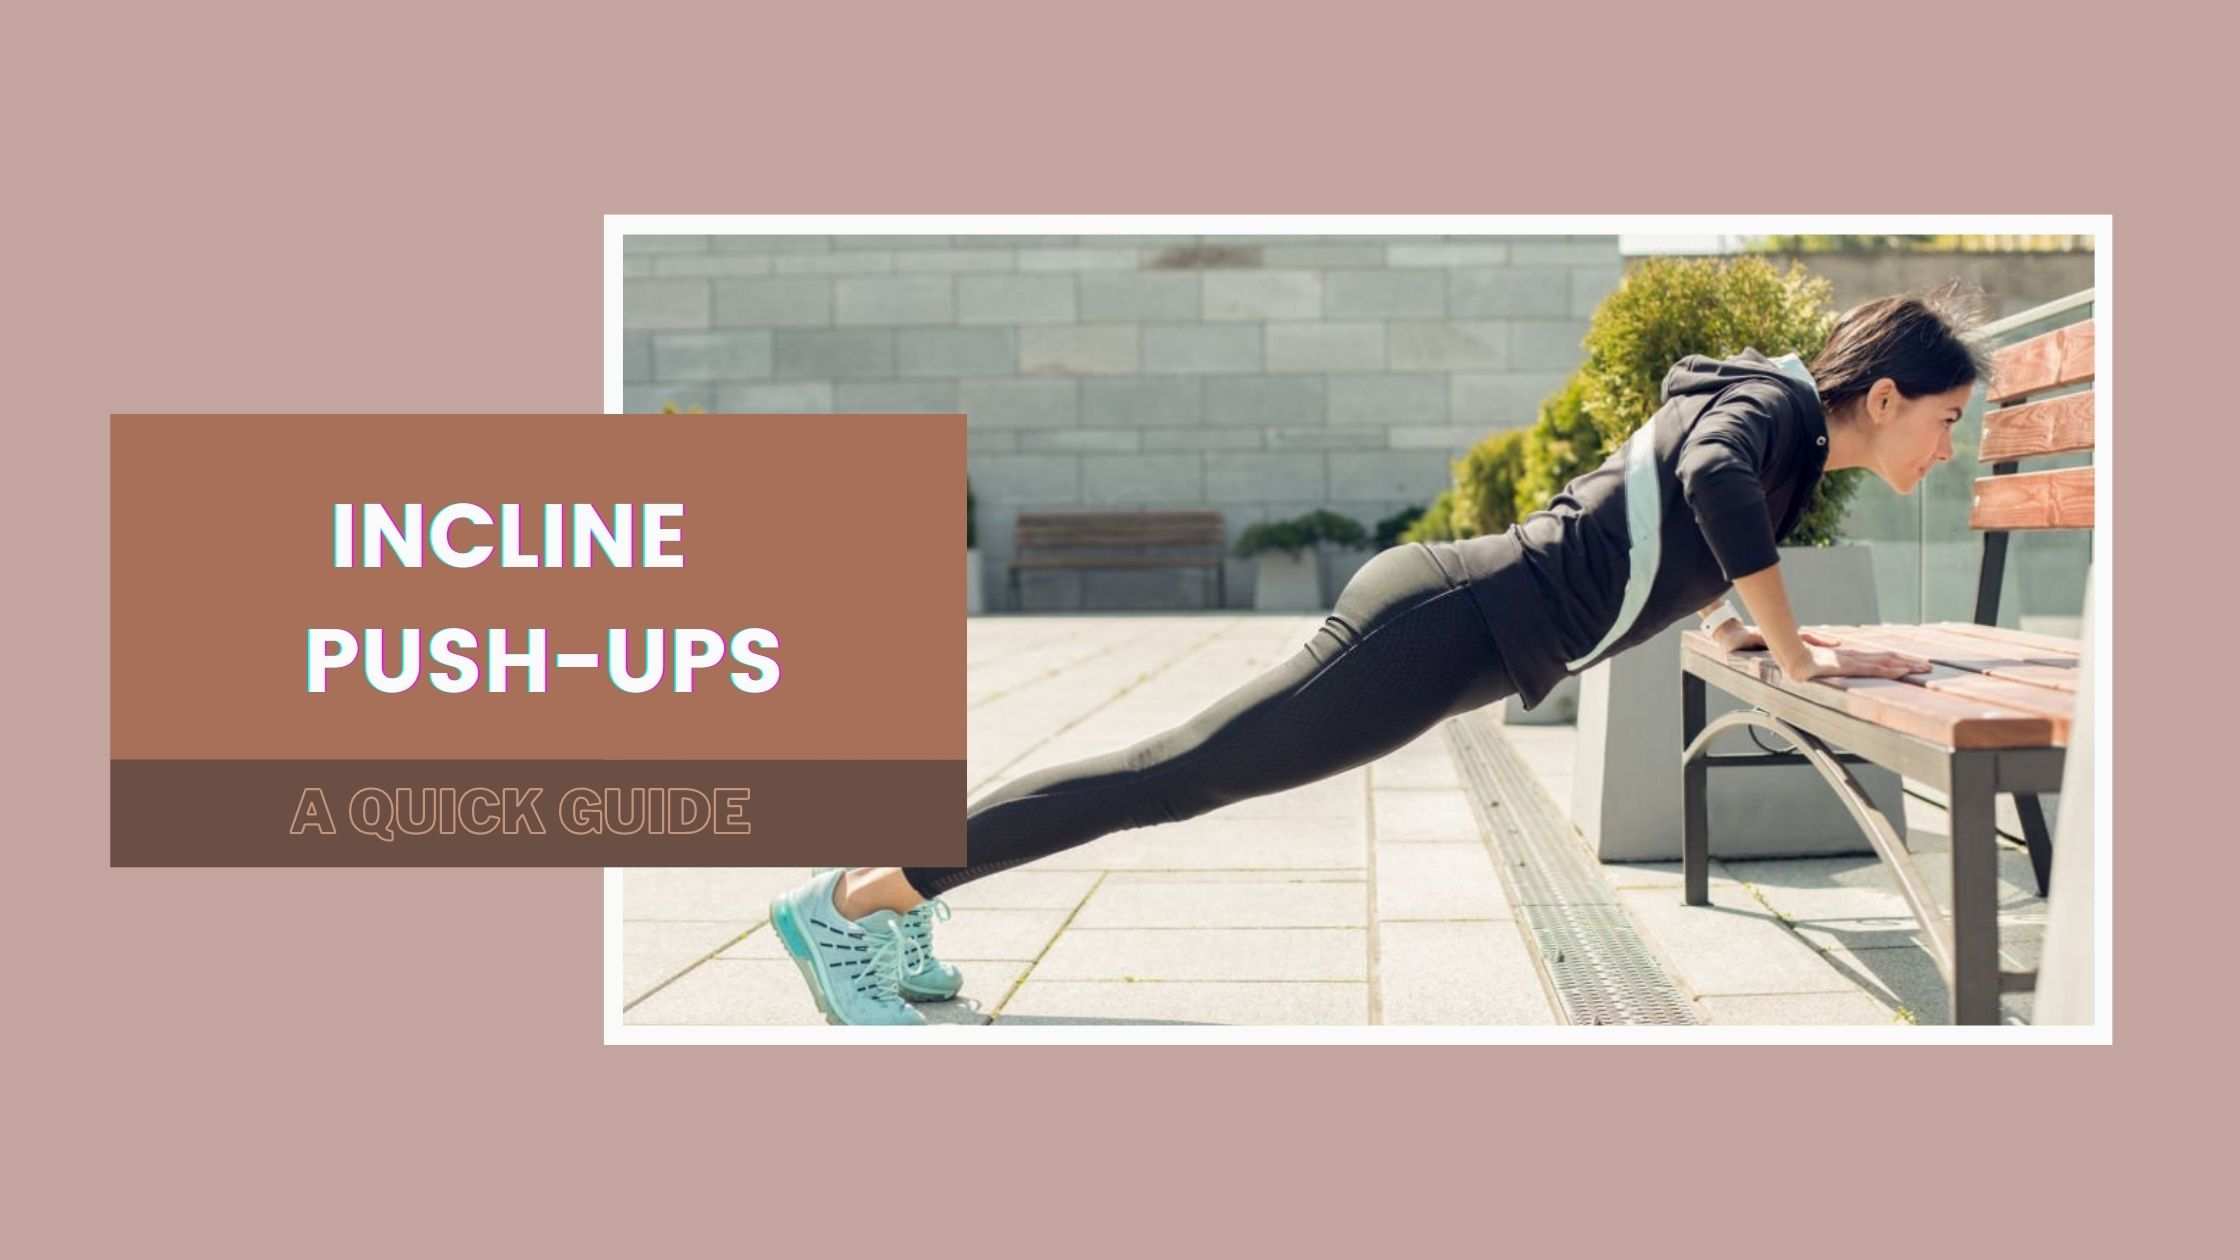
Are you a gym enthusiast? When it comes to gymming sessions, people love doing variations of workouts. One such favorite of them all is a push workout session. It trains the upper body parts like the chest, shoulders, and triceps. One of the most popular forms of push exercises is push-ups. As a beginner, your trainer must have recommended the incline push-ups. But alas! People blind perform these push-ups without knowing their proper movement. They just do so by copying a person at the gym. But is that the right way?
One of the best ways to activate your chest muscles is via incline push-ups. Incline push-ups target chest muscles. They activate the pectoralis major and minor chest muscles. These push-ups, unlike the traditional ones, put less pressure or stress on the elbows. Your body weight pressure is decreased, making it easy for people to lift themselves.
Incline Push-ups For Beginners
Incline push-ups are perfect for beginners. Those who want to train their upper body (shoulders and chest) should start with incline push-ups. These sessions are perfect for seniors, or people who are going under the shoulder and upper-body rehab.
The best part about the incline push-ups is that they can be performed anywhere! Take a wall, a desk, or a table, just lean against them, and you are good to go!
These push-ups improve body strength and improve quality of life. They also work on muscle strength. One may opt for a bodyweight workout routine. If you are unable to perform traditional push-ups, these are for you! Just lean against a wall and you are good to go. These sessions work best as a warm-up routine or just a post-workout stretch.
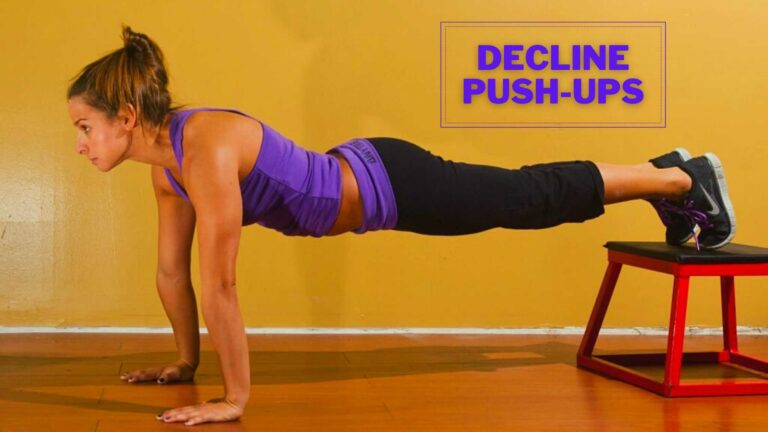
Related Article: Decline Push-Ups – How To Do, Benefits, And Variations
Advantages of Incline push-ups
Some say these are warm-up exercises, and some say these are just for beginners, but incline push-ups are much beyond those! A highly beneficial workout exercise, incline push-ups are the hidden gems of the gym world. They benefit all, be they athletes, aesthetics, powerlifters, or bodybuilders.
Incline push-ups have simple movements. You just have to push some part of your body weight against the surface. The traditional push-ups are performed differently, here the person has to stand parallel against the floor. Later they have to push the body against the ground in a parallel position via the chest muscles (no shoulder or arm movement). The pressure is directly felt on the chest.
Incline push-ups work the same. These push-ups are done on an inclination. They target the main chest muscles called the pectoralis major and minor. But these not only target the chest but also engage the deltoid and tricep muscles.
Your shoulders and arm will be engaged along with the main chest muscles. Other muscles can be activated too (like on the hips, abs, back, and legs). These muscles do not engage but prevent and stabilize the arching of the spinal column. The sagging is prevented during the motion. Make sure to have a slow and steady position. Your movement should be deliberate and engage the core.
⚠️ Make sure to do proper breathing along with the incline push-ups. Some people ignore the slow movement and go for rapid rounds. This may cause injuries or target the wrong group of muscles.
Getting back and forth in the traditional push-up is a task. Not all can perform it with ease. Thanks to the incline push-ups, you can easily learn the movement. It is for the starters and hence should be used to properly explore the chest muscles. Later you can try to perform a traditional push-up.
But make sure your transition is slow! Do not jump from wall incline push-ups to a traditional one. As explained, change the inclination and slowly make it flat. You’ll experience less support from the other muscle groups and can reach the advanced stage.
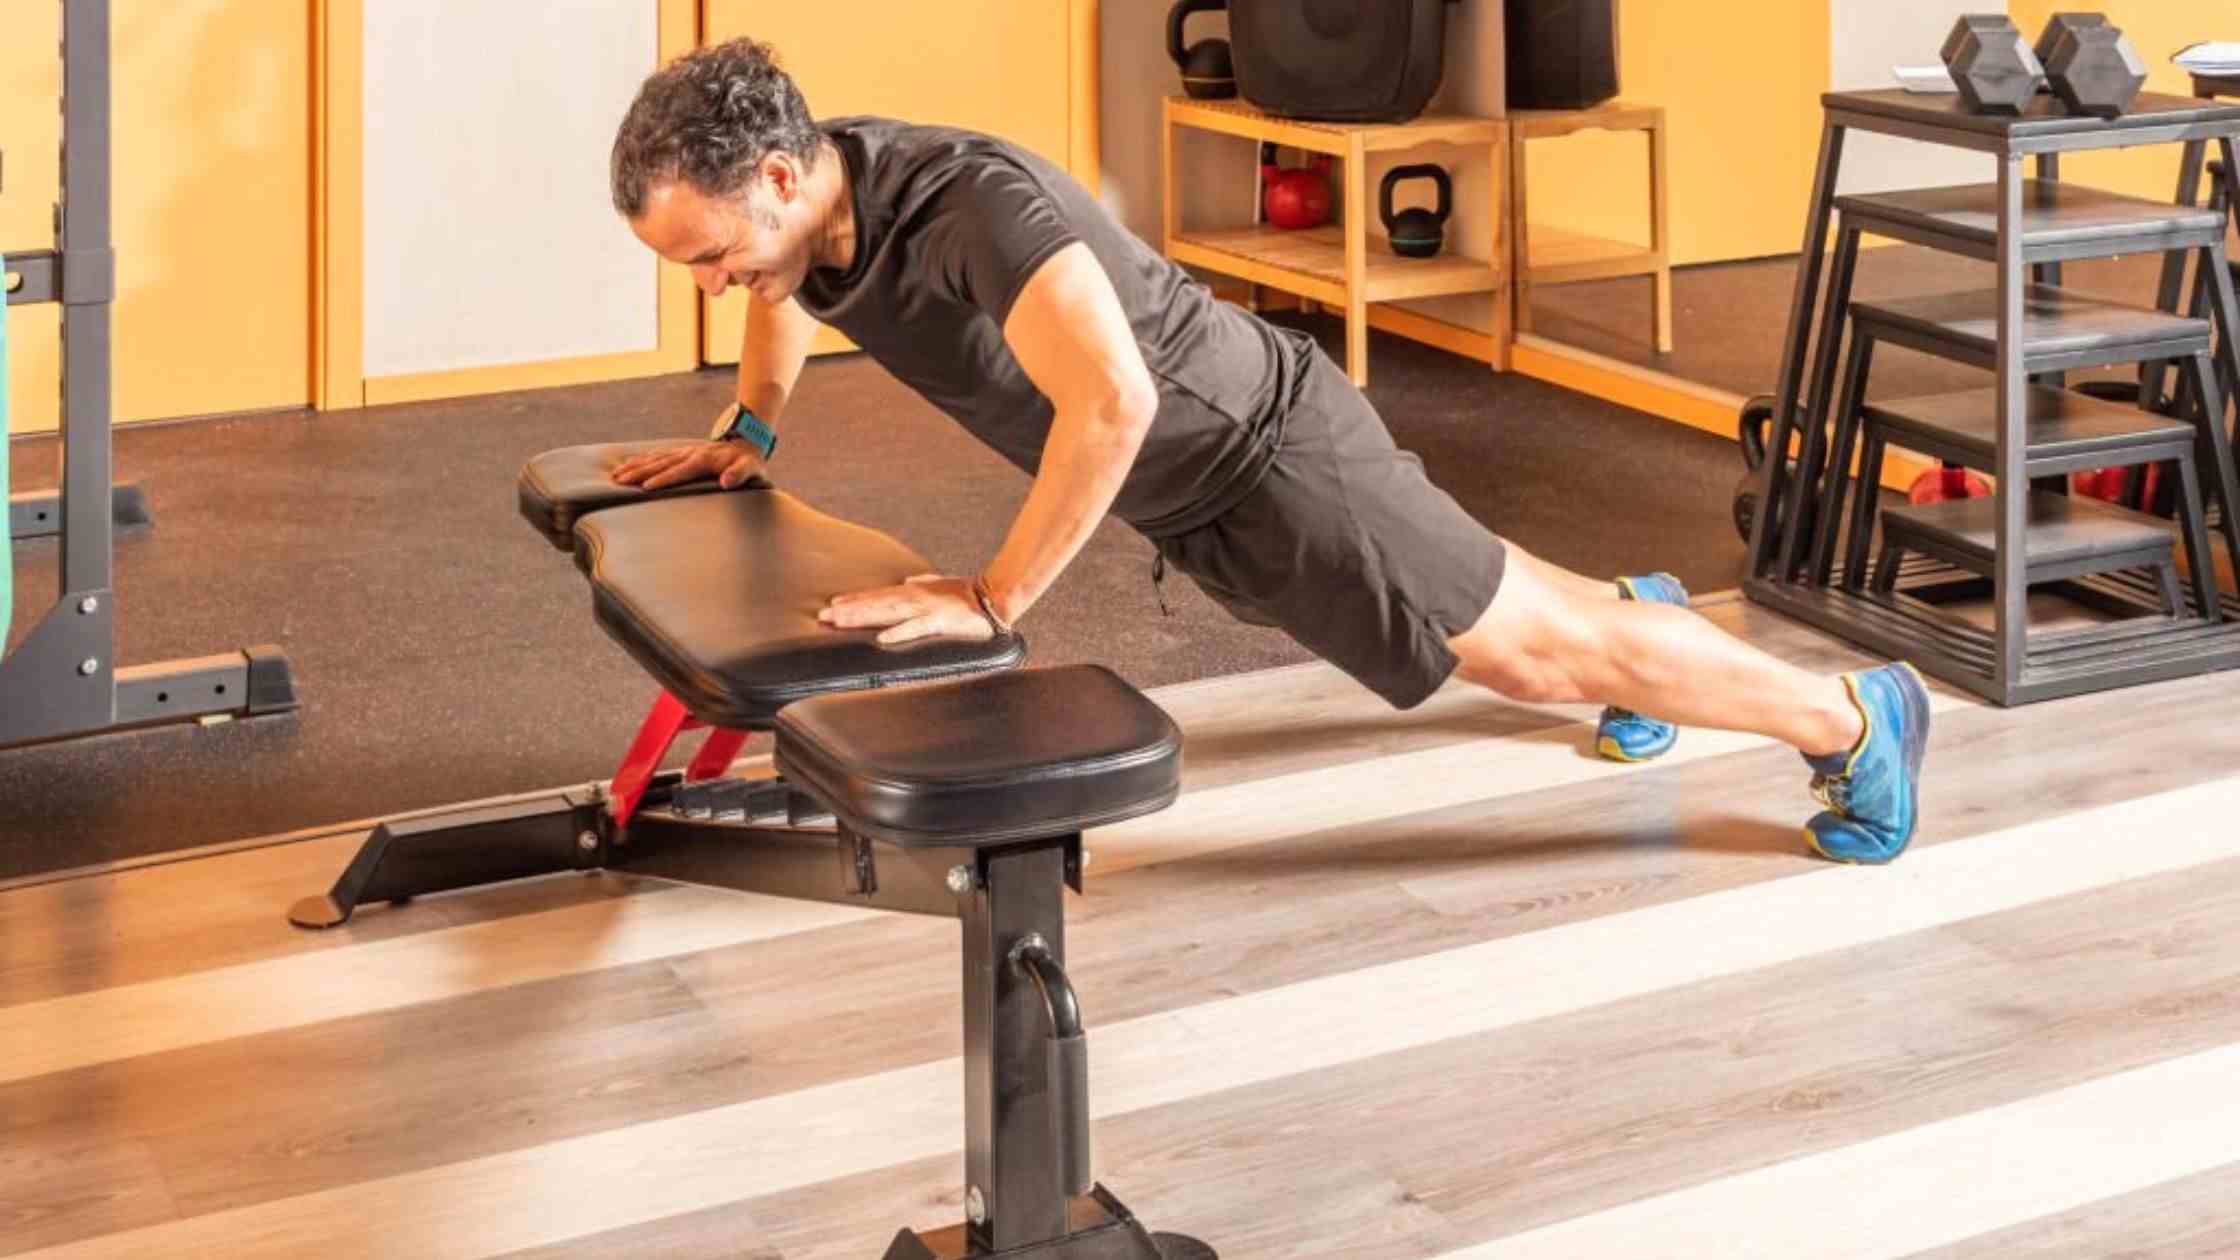
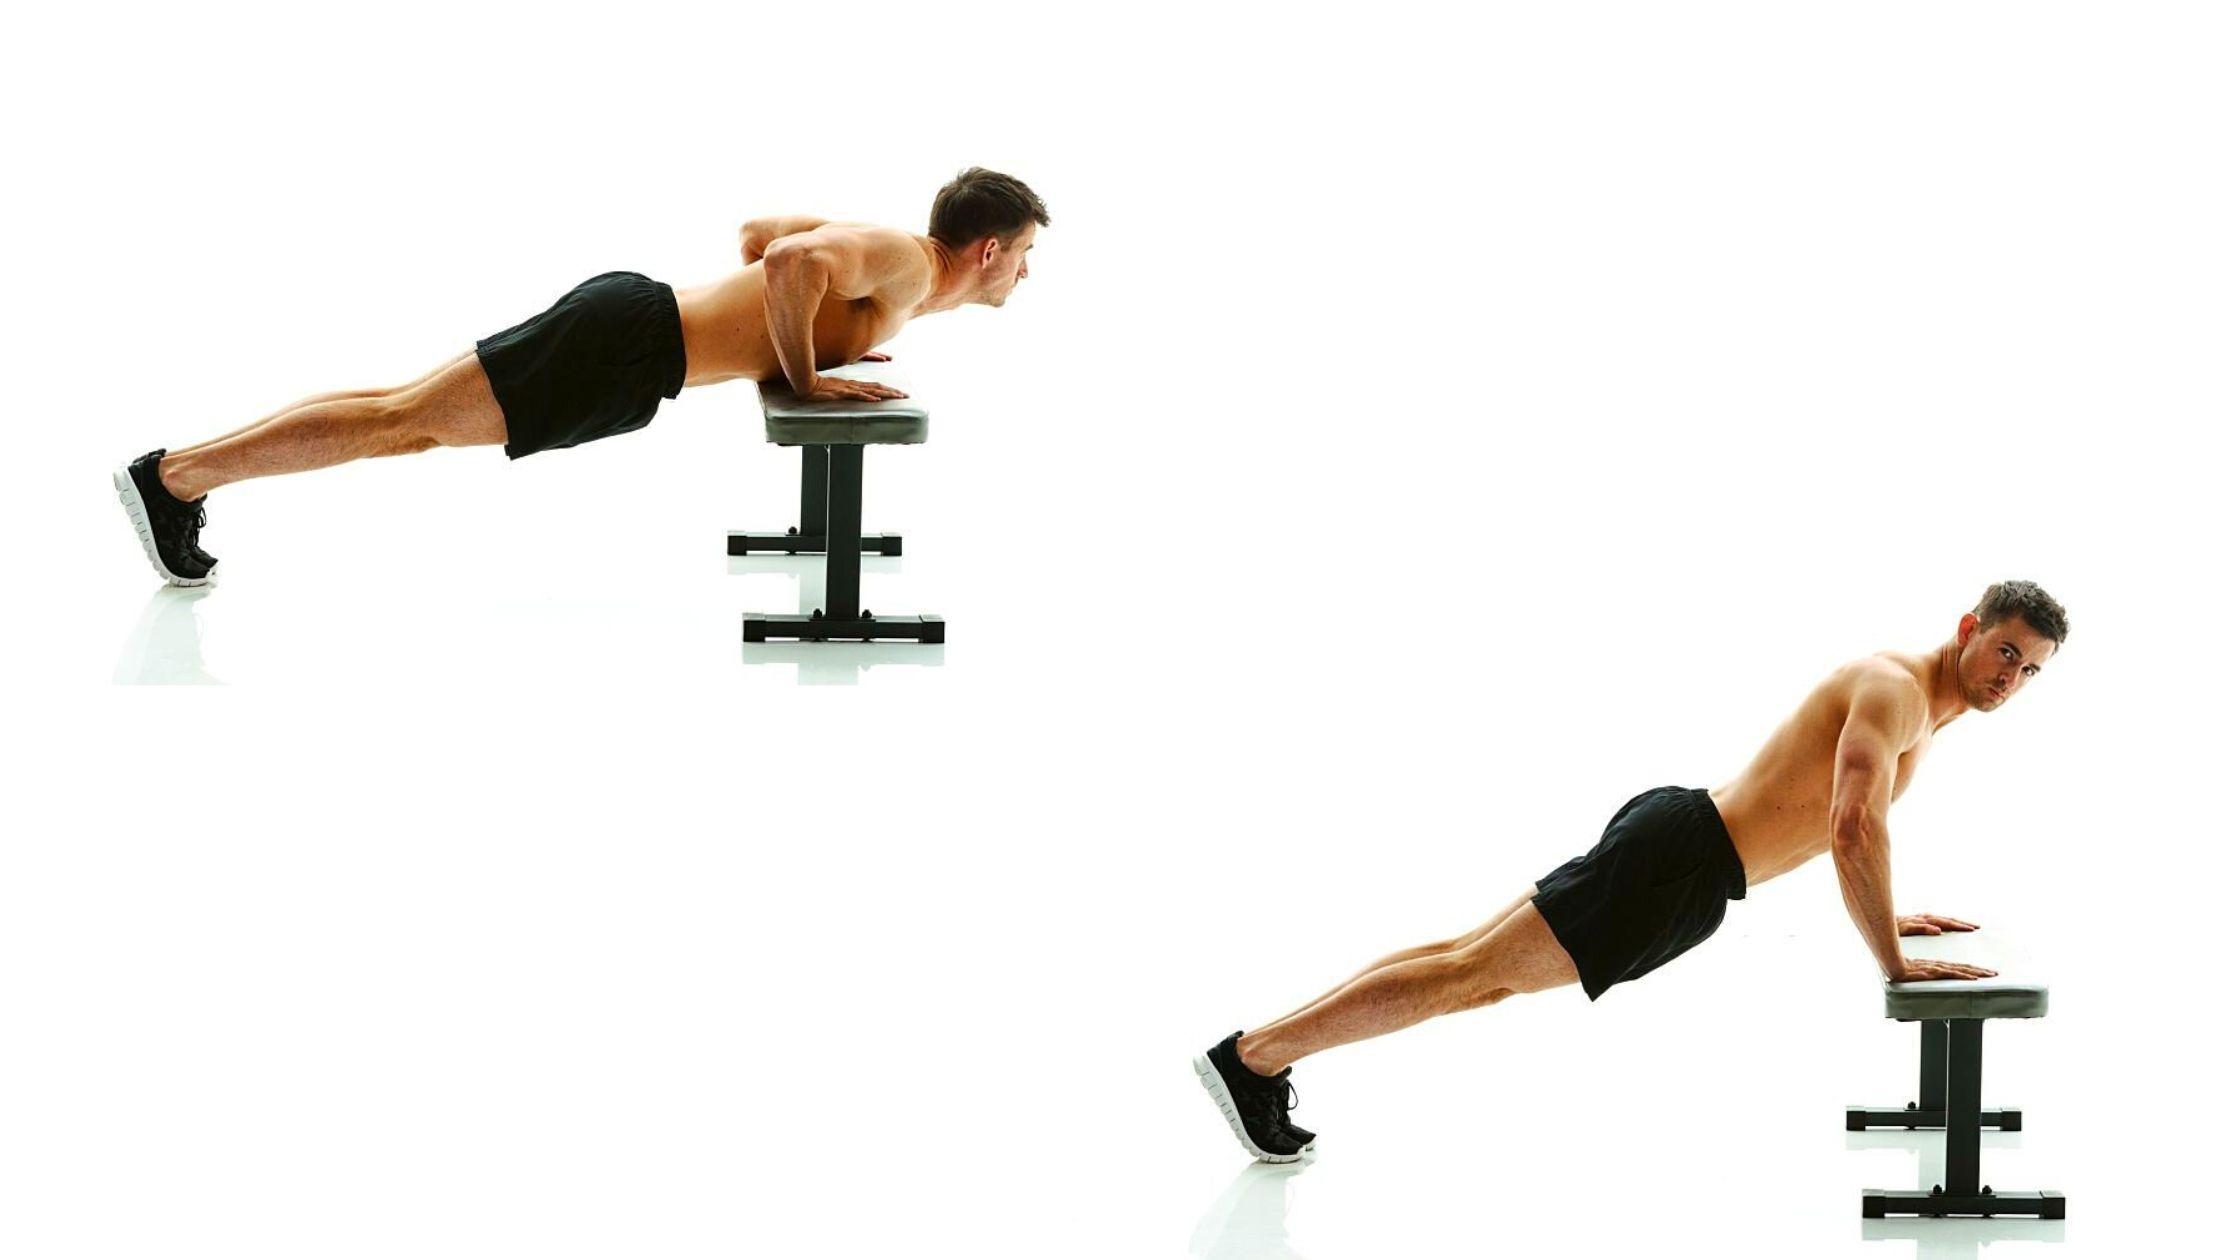
Start with wall push-ups and slowly move to table ones (make sure you are able to perform wall push-ups easily). From a table, move to a countertop (count your reps and sets). You can later practice it on a sturdy chair. Move to a bench or a low step (least inclination) before you try the traditional one.
This will make you feel less stressed about the main chest muscles. Slowly, the supporting muscle groups will leave and your body will feel less sore than usual.
How to perform these push-ups?
Performing an incline push-up is another challenge. Everyone knows the basics but only a few follow the instructions. Do not move ahead if you’re not clear on the instructions.
Before we dig into the same, let your trainer help. They may show or perform the workout. It will help you know how these movements are carried out.
Let’s go through some of the incline push-up instructions!
- Take a surface, preferably a wall. Stand against it (facing the surface).
- Place your hands on the wall wider than shoulder length (but not too wide).
- Here the arms should be straight and the elbows should be locked. Your shoulders should be behind with your chest in the front position.
- Align feet with each other. These should also be straight along with the arms and body.
- Your feet should be at a normal distance (not more than the shoulder).
- Slowly start bending your elbows, and lower the chest. Do not unlock the shoulder and elbow lock.
- You have to feel the strain on the chest! Make sure you do that. Breathe in as you move toward the surface and keep your body straight and rigid throughout the movement.
- Slowly reach the surface and start moving against it. Remember you do not have to unlock the arms and shoulders yet. Breathe out slowly as you move against the surface. Keep the elbow extension slow and push the muscles up.
- Here also, you’ll experience the chest muscles being active. Keep the same position while taking reps. Once you get tired, take rest but do not perform a wrong push-up!
Steady repetitions are not a cakewalk. You may take time to perform. Start with fewer reps and more sets. You can target 10 reps in each set. Keep your sets around 2-3. Make sure to keep breathing properly. Your breathing plays an important role in engaging the muscle groups!
One can also create a vacuum before performing the push-ups. Breathe in before the inclination and hold your breath till you get up again.
There are many common mistakes that one may perform during incline push-ups–
- When the person has a wide-hand position
It may seem comforting but isn’t. This disorients the chest muscles and opens the arm and shoulder locks. The too-wide arms may reduce the range of motion and won’t target the chest muscles. Just spread the arms a little more than the shoulder broadness and you’re good to go!
- When the person is in poor alignment
You’ve to keep your body straight. If you’re unable to do so, you’re performing push-ups in the wrong way. It may also cause injuries! Do not slump, sag or bend the hips and knees. Keep them straight and maintain alignment. Work on the core muscles to perform the push-ups properly.
- When the person is performing controlled ROM
One has to perform a full range of motion to get the best benefits. You’ve to keep the arms straight and perfectly bent ( do not perform half exercise). If you’re unable to get down or up, choose a higher inclination (like a wall for starters).
To Sum Up
Incline push-ups are the best. They work comprehensively on all muscle groups including the chest and core. Your core has to be strong enough to hold you in an upright position. People with upper body injuries or who recently had a joint injury should start training with incline push-ups.
These workouts can be performed easily anywhere! Just take a chair and start your push-up. These offer great portability and are perfect for home workout sessions. You just need to make sure your movement is perfect. Incline push-ups are available in many modifications and are easy to learn. You may start with a wall and move to a 3-foot-long step.
These push-ups are great to strengthen your glutes and cores. You may not feel it, but you’re alternatively training your abs as well! Breathing is important throughout the session so make sure to give your muscles the oxygen dosages!
Incline push-ups can be performed by the elderly too. But is it that easy? We recommend you take guidance from a trainer or expert. The key is to perform right!